Bottle Butterflies
By Betsy, age 17, Idaho

Introduction
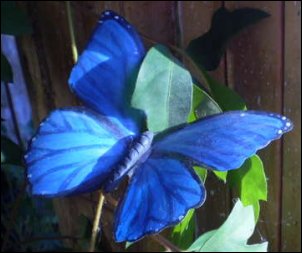
Learn how to make beautiful, realistic butterflies from old plastic bottles. The curve of the bottle will make the wings of the butterfly look realistic, and by using acrylic paint you can make any kind of butterfly you want, real or whimsical!
Materials
You absolutely need:
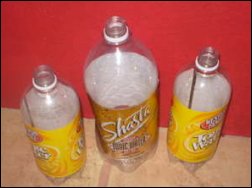
♥ Old plastic bottles (especially 1 liter ones ... they have a bigger surface for more butterflies, but any bottle with straight sides will do)
♥ Push pins (thumbtacks)
♥ A piece of wood that you are able to push the thumbtacks into
♥ Acrylic paint
♥ Sandpaper (220 works best for me! :D)
♥ Polymer clay (browns and blacks mostly)
♥ Strong glue (I have used hot glue, but it doesn't seem to be strong enough. I suggest Gorilla Glue or some kind of epoxy)
♥ Paintbrushes
♥ Sharp scissors or an Exacto knife
It's also helpful to have:
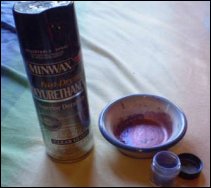
♥ Clear spray varnish (preferably oil based)
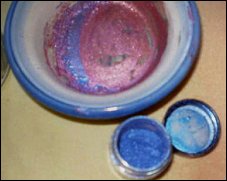
♥ Pearl Ex-which is a mica-based powder that makes the wings shimmer!
♥ Black wire
♥ Small black seed beads
♥ Gel acrylic medium (matte)
Step 1: Prepare the Bottle
To prepare your bottle for being turned into a butterfly, first wash the label off. I do this by soaking it in my sink with some dish detergent, and then picking any bits off that don't come right off. If there is still a thin strip of gluey goo stuff, don't worry about it.
Cut around the top of the bottle to get the top off. All you want to use is the straight part of the bottle - no curves. Do the same to the bottom. As soon as you have a cylinder of plastic, cut down the side with the gluey goo to create a rectangle of plastic.
You have to sand the plastic so that your paint will stick to it well. The side you will sand is the side that was on the outside of the bottle. I use 220 grit and sand in a circular motion until the bottle appears "frosted" or matte. You can also work to 400 grit, but I only use 220 because I want my bottle to be rougher, so that the paint sticks better.

Step 2: The Set-Up
You will need to figure out what kind of butterfly you want to paint. I just Google imaged pictures of butterflies to get ideas. There are some incredible tropical butterflies out there! I have also made local butterflies, such as monarchs, as well.
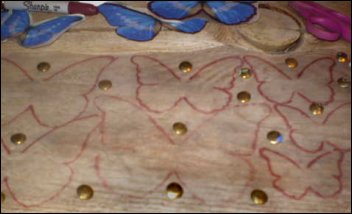
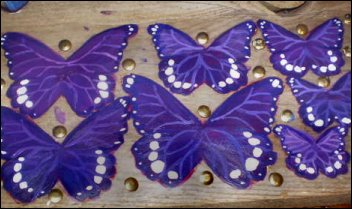
Once you get an idea of what kind of butterfly you want, print out some pictures of them. Then cut out the outline of the butterflies, and trace them onto your plastic with a permanent marker, making sure that they are set up so that the tips of the wings are parallel to the top of the plastic, so that when you fold the wings, they wont be all funny! (see picture) To trace easily, weigh the ends of the plastic down with something heavy.
You need to pin your plastic to your piece of wood. To do this, lay it down flat on the wood and push in pins wherever you can find space, but NOT inside or on the butterfly shapes! You want your plastic to lie fairly flat, so don't hold back using those pins! :D (A good workout for your thumbs too!)
Step 3: Painting the Base Layers
Now you will paint a base layer for your butterfly. If you have gel acrylic medium (matte), paint it on first. Your brush strokes should always go from the center of the butterfly out towards the wings. Let this layer dry before moving on.
Base layer: You will want a base layer to block some light and make a better surface to paint on. I suggest using a light color of paint, because white is a colloid and will look more solid. If you know the color of the bottom of the butterfly's wings that you want to paint, go ahead and use that color. Again, brush from the center to the wings, but stay inside the lines! Some practice will make you better at this.
Let your layer of paint dry before adding the next layer. I use a hair dryer set on low to speed this up because I tend to be an impatient artist. :D
Next layer: Background
Look at the picture of your butterfly, and paint the butterfly on your plastic with that color. If your butterfly is 2 colors, like a monarch, paint it the lighter color (It's easier to paint over).

Step 4: Add the Details
To really make your butterfly look good, you should add some details. Veins, in particular, really add to the finished effect. Use a very fine tipped paintbrush for your veins, and either a lighter tint or a darker shade of the color of your background to make the veins. Since I'm doing whimsical butterflies for this example, I just put dots wherever I felt like it, but if you're painting a realistic butterfly, it's best to look at your picture as a guideline. Again, using a fine paintbrush will make your butterfly that much better!
While your masterpieces are drying, make your butterfly bodies:
Look at your picture, and form a body like the one in the pic. I use a toothpick to add details like lines to it, but that's optional, depending on how realistic you want the butterfly to look. To make antennae, cut short lengths of the black wire and stick them in the body. To add eyes, use black seed beads and press them into the clay. You can also make eyes out of the clay as well. Fire your butterfly bodies. Most polymer clays bake at 275 degrees F, but check the temp and bake time just to be sure.
Step 5: The Final Details
If you want your butterfly to shimmer like some real butterflies do, use Pearlex powder to add some sheen. Take a clean paintbrush and make it damp, and dip it into the powder. Then, in careful strokes, add some sheen to your butterfly.
When your butterfly is dry, cut out the outline with sharp scissors. Then you need to spray them. I use oil based enamel spray to make them shiny, but if you don't want shine, you can use matte spray. DO NOT SPRAY THE BODIES!!! Oil based finishes and polymer clay react in such a way that the polymer clay just stays sticky and it's really annoying.
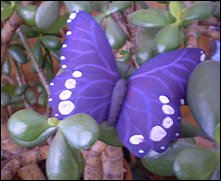
When you get your butterflies sprayed, and they dry, you are ready for the last step: putting it all together. Use super glue or epoxy to glue the body to the area inside the wings. Ta Da!!! Lovely butterfly!
Uses for Your Beautiful Bottle Butterflies
There are many uses for the lovely butterflies you have just created:
♥ Glue a loop of wire onto the back and make an ornament or a gift wrap tag.
♥ Glue a push-pin onto the back and make it a wall decoration - just push it wherever you want.
♥ Glue a dowel with a sharpened end to the back to make an awesome plant stake!
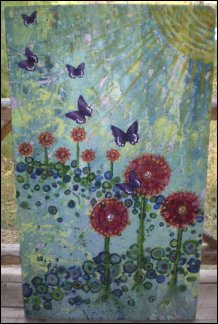
♥ Glue it onto a painting (what I usually do). It adds a great 3-D, whimsical touch.
♥ Glue it onto a picture frame.
♥ Glue a suction cup onto the back to make a window decoration!
Your uses are limitless! Who knows what other wonderful ideas are out there?
Anyway, I'm interested in what you thought about this article and how your Bottle Butterfly turned out. (You can reach me using the response form below.) Happy crafting! :D
NOTE: My first article for Sweet Designs Magazine is a re-edited version of something I originally posted on instructables.com, where I'm known as "shortone". The link for this project is: http://www.instructables.com/id/Bottle_Butterflies/